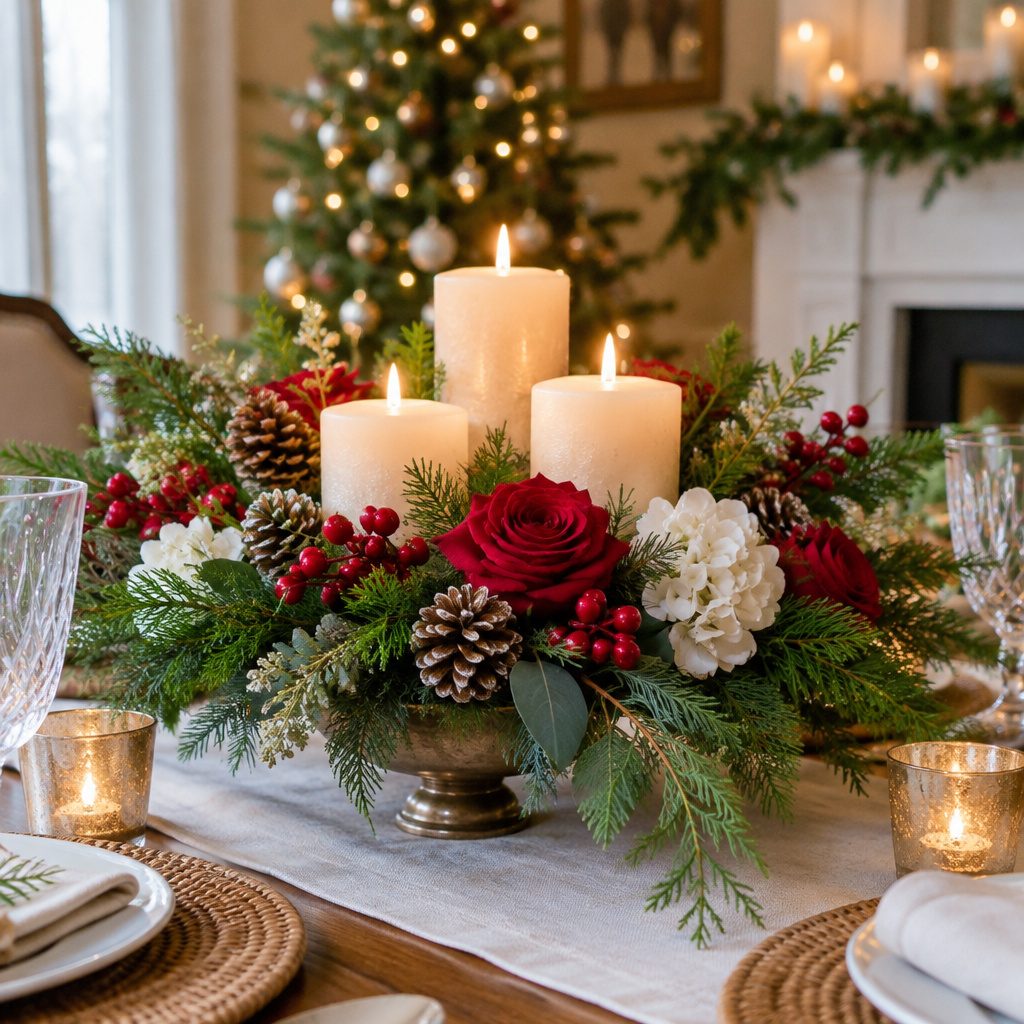
Shimmering holiday tables start with one standout centerpiece. Pick one that fits your space, your budget, and your style.
1. Wintergreen Candle Woodland Bowl
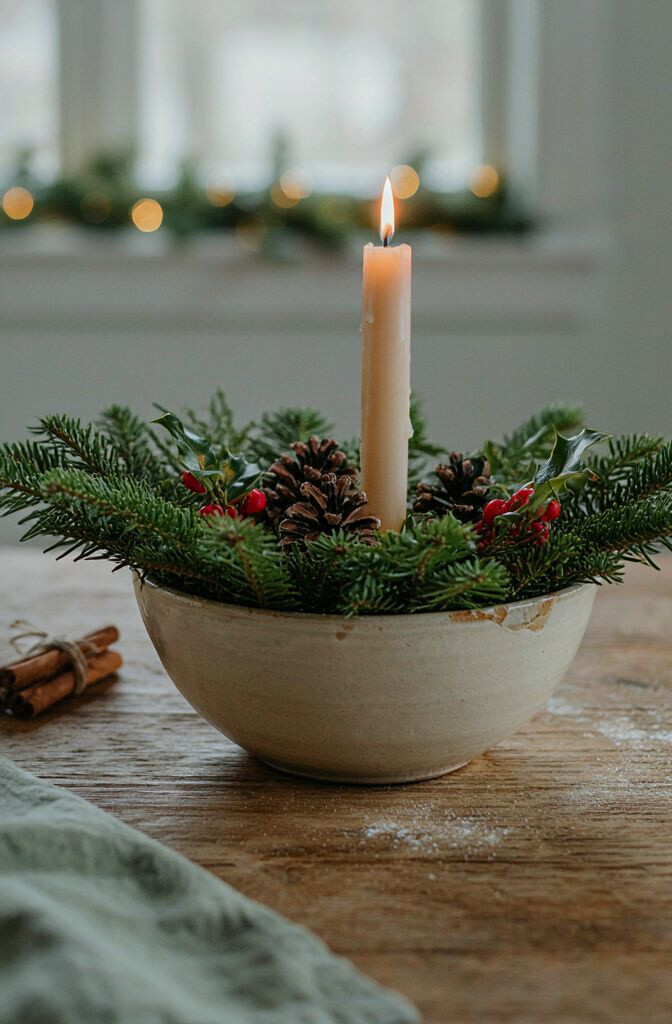
Use a shallow bowl as your base and tuck in faux pine, wintergreen sprigs, and tiny berries. The glow makes the whole table feel like a quiet cabin at night.
Arrange the greenery in a ring around a central candle so it looks full from every side. Keep the candle stable with a ring of floral foam or a small sand bed in a hidden liner. For a unique touch, add a mini pinecone “cap” on top of the greenery and tie a thin ribbon around the bowl for a polished finish.
2. DIY Snowy Pinecone and Branch Runner
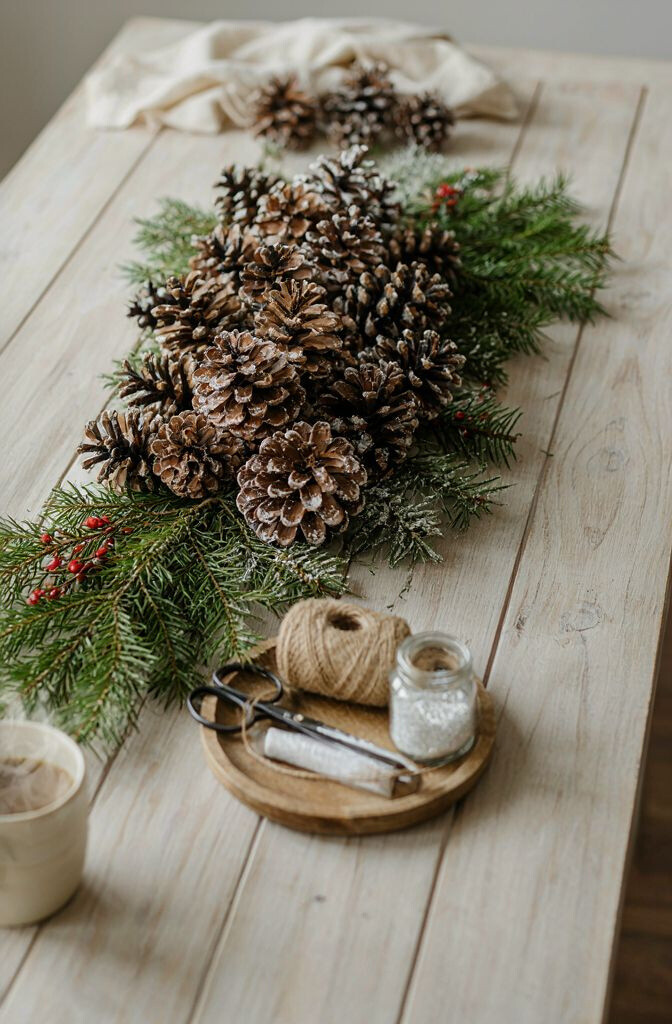
A pinecone “runner” looks rustic and festive without taking over the whole table. Lay it like a gentle path down the center for an easy, eye-catching design.
Start with a strip of burlap or kraft paper, then glue or hot-glue pinecones and short branch pieces along the middle. Dust everything lightly with faux snow spray for that just-lifted-from-the-winter look. If you want extra sparkle, tuck in a few small battery fairy lights between pinecones so the runner glows when the room goes dim.
For cost control, use branches you collect on a walk and pinecones you already have. Personalize it by painting a few pinecones in metallic gold or matte white, then keep the rest natural for balance. Choose a runner length that matches your table, and leave a little breathing room near the ends so the design feels airy, not crowded.
3. Mason Jar Starry Holiday Lanterns
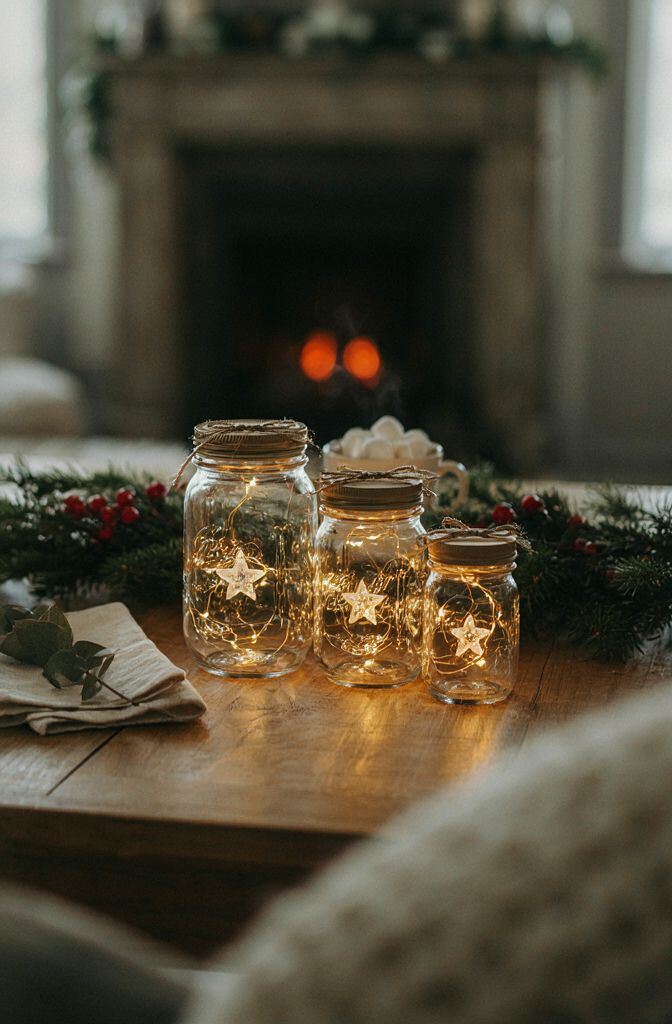
Mason jars are perfect for quick centerpieces because they’re sturdy and easy to style. Turn them into little lanterns that look like stars when the light hits.
Paint the jars lightly with white acrylic, then brush on a thinner second coat so it looks snowy instead of solid. Cut star shapes from cardstock, wrap them with clear tape, and slide them into the jar behind the light so the silhouette appears on the glass. Place a LED tea light or small string light inside each jar and line up three to five jars down the center.
Make it unique by choosing different star cutouts, like simple five-point stars or more detailed snowflake-star hybrids. Add a strip of plaid ribbon around the jar neck, or use twine for a more farmhouse vibe. Keep your jar spacing consistent so the centerpiece looks intentional from left to right.
If you’re worried about clutter, keep the jar height similar across the group. For personalization, write small “holiday” words on tiny tags and tuck them under the ribbon. This project is budget-friendly because most supplies can be reused year after year.
4. Floating Ornament Glass Bowl
A clear glass bowl instantly makes your centerpiece feel modern and airy. Floating ornaments catch light and create a “wow” moment without extra work.
Fill a glass punch bowl or hurricane vase with water and float a few shatter-safe ornaments on top. Add a strand of LED lights underneath so the glow travels through the water like gentle stars. For practical tips, use warm water to reduce foggy condensation and keep ornaments evenly spaced so the bowl looks balanced.
5. Dollar-Store Garland Table “Stack” Centerpiece
You can build a big holiday look from simple pieces when you create layers. This centerpiece uses garland, a candle, and stacked containers for height and shape.
Start with a long garland and drape it down the center, then tuck in a few ornament clusters at varying spots. Place a candle or small lantern in the middle and build a mini stack using two to three boxes or trays covered with craft paper. Cover the stack with ribbon and secure the garland so everything stays in place during dinner.
To make it feel unique, choose one theme color like deep red and evergreen, or go monochrome with silver and white. For cost considerations, shop your home first for candlesticks and risers so you only buy what you truly need. If you want a trend-forward look, add a couple of oversized ornaments that match your lighting for a modern “designer” feel.
6. Citrus Cranberry Mini Topiary
A small topiary centerpiece brings a fresh, fragrant feeling to the table. It also looks expensive even when you keep the materials simple.
Use a foam ball (or a florist foam alternative) on a short stand, then stick in clusters of faux cranberries, mini citrus slices, and evergreen tips. Add a few cinnamon sticks around the base for warmth, and finish with a festive ribbon tied in a bow. Place it on a tray with scattered berries so it looks grounded and not floating.
Personalize by swapping faux fruit colors, such as oranges and lime for a playful twist. For practical tips, keep the foam lightly covered so it doesn’t show gaps between branches. If you’re using real cinnamon, replace it before it dries out so the centerpiece stays neat.
7. Tartan Runner with Folded Napkin Pinecones
Instead of buying a pricey centerpiece, you can use your table setup as the main design. A tartan runner paired with folded napkin “pinecones” feels cozy and festive.
Lay a tartan ribbon or cloth runner down the table and place a few medium candles at intervals. Fold napkins into cone shapes and tuck the edges to mimic pinecone ridges, then secure each with a small piece of ribbon. Add a tiny sprig of greenery to each cone so they look like they belong together.
For a unique look, vary the napkin colors—classic red and green, or soft cream and evergreen. Keep the cones the same size so the centerpiece looks tidy and symmetrical. Budget-friendly tip: use napkins you already own and keep the “glam” limited to ribbon and a touch of faux snow.
8. Vintage Book Page Christmas Wreath Candle Ring
Book-page crafts are trending because they feel nostalgic and clever. This centerpiece uses a candle ring built from rolled paper for a warm, old-fashioned look.
Tear or cut vintage-style pages into strips, roll them into tight coils, and glue them into a circle around a candle holder. Add a few small paper leaves or star pieces at the top so the ring looks layered. Place it on a tray and surround with tiny ornaments or dried greenery for extra texture.
To make it unique, choose pages from sheet music, old dictionaries, or themed holiday books. Personalize the color by tinting the paper lightly with tea or acrylic wash so it looks aged. For practical tips, test glue strength first so the coils stay secure when the candle warms the area.
If you want a safer setup, use a LED candle instead of a real flame. This keeps the craft intact and reduces worry during dinner. Add a ribbon around the tray to tie the centerpiece to the rest of your decor.
9. Seashell Starfish Holiday Coastal Centerpiece
If you love the beach vibe, you can make a coastal Christmas centerpiece without losing the holiday spirit. The key is balancing airy textures with festive color.
Use a shallow tray and layer it with white sand or crushed seashells. Add starfish-shaped ornaments or painted seashells, then sprinkle a few faux pine tips and small red berry picks for contrast. Place LED candles in the center so the light bounces off the shell texture.
For practical tips, keep your shell arrangement in a clear focal line so the centerpiece feels intentional. Personalize it with a color palette like teal and silver, or sand and navy. If you want a trend-forward touch, include one unexpected element like a mini driftwood “reindeer” figure painted gold.
Cost considerations are great here because many people already own holiday ornaments and can reuse decorative trays. Just be mindful of saltiness if you use real shells, and wipe them clean so they don’t smell strong.
10. Pinecone Succulent Snow Planter
Combining greenery and a little “snow” effect gives this centerpiece a fresh, living feel. It also adds contrast because pinecones bring warmth while succulents feel modern.
Use a small planter, then arrange a ring of pinecones around the edges. Fill the center with succulents or faux succulents, and add white faux snow or flocking on top of the pinecone tips. Add a few tiny sprigs of evergreen to connect everything visually.
Make it unique by choosing succulents with different leaf shapes, like rosette and spiky varieties. If you’re using real plants, choose a planter with drainage and water lightly before setting it on the table. For practical tips, keep watering needs in mind so you don’t create puddles during dinner.
11. Evergreen Swag with Hanging Mini Ornaments
A hanging centerpiece feels special because it draws the eyes upward. This is great for tables with limited counter space.
Start with a lightweight base like a foam strip or a long piece of cardboard covered in greenery. Drape faux evergreen along it, then tie thin twine or ribbon loops where you want ornaments to hang. Use assorted mini ornaments and a few tiny bells to create movement when people pass by.
For personalization, pick ornament colors that match your plates, such as classic red and green or gold and white. Keep the ornaments at different lengths for depth, but make sure they won’t swing into food. If you want extra sparkle, thread a few tiny LED lights through the branches near the top.
Cost considerations are friendly since faux greenery often lasts multiple seasons. Choose lightweight ornaments to avoid stretching the twine and double-check that your base is stable.
12. Glam Glitter Birch Candle Holders
Birch-style decor makes everything feel bright and wintery. These glitter candle holders look like they came from a high-end store.
Wrap candle holders or short glass cups with paper in a birch pattern, then seal with a matte clear coat. Add glitter only to the upper rim or to a few random “frost” stripes so it doesn’t feel messy. Arrange three holders in the center on a tray with scattered faux berries and evergreen shavings.
To make it unique, use different sizes of holders to create a gentle slope up toward the middle. Personalize with a small monogram tag on each candle holder or a color-matched ribbon bow. For practical tips, use LED candles if glitter is exposed near flame areas.
13. Clothespin Photo Memory Christmas Centerpiece
This centerpiece is sentimental, and it doubles as table decor. It turns family photos into a festive display without needing a bulky frame.
Hang a short garland across a flat tray or between two small risers, then clip small holiday photos onto the garland using clothespins. Add faux greenery and a few small ornament clips so photos feel integrated, not tacked on. Place a candle or lantern at the center to tie in the “traditional centerpiece” glow.
Personalize it by adding a theme, like “first Christmas memories” or “family craft night.” For practical tips, print photos slightly smaller than you think so they don’t overwhelm the tray. If you’re budget-conscious, use prints you already have and swap out the clips each year for a quick refresh.
For a trend-forward look, use black-and-white photos with one pop color like red ornaments. Keep the garland color neutral so your memories stand out.
14. Mini Snow Village Terrarium Table Scene
A tabletop snow village is playful and magical, especially for kids and families. You can build it with a terrarium base or a clear box container.
Layer the bottom with faux snow, then add miniature houses, trees, and tiny figurines. Place a small LED light inside or underneath so the scene glows like a nighttime winter street. Add a few sprigs of evergreen around the base so it feels connected to real nature.
Make it unique by choosing a specific story theme, like “winter bakery” or “cozy cabin night.” Personalize with painted rocks shaped like tiny hills. Cost considerations are easier if you buy mini pieces gradually or use what you already own from seasonal displays.
For practical tips, secure loose items with a tiny dot of hot glue so nothing shifts during dinner. Keep the terrarium lid slightly open if you’re using battery lights that create minimal heat. This centerpiece looks great from all angles because the container protects the scene.
15. Chocolate Candy Cane and Peppermint Centerpiece Tray
If you want a centerpiece you can actually enjoy, this one is a treat. It’s colorful, sweet, and perfect for casual holiday tables.
Use a long serving tray, then line the middle with wrapped candy cane pieces or candy sticks. Nestle small peppermint candies around a central candle or small lantern, and tuck in a few greenery sprigs to balance the bright candy colors. For personalization, add mini wrapped chocolates with different wrappers that match your plate colors.
For practical tips, keep candies away from direct candle heat by using LEDs and placing the candle in a safe center holder. Cost considerations are flexible because you can use a few premium candies at the focal points and fill the rest with affordable options. This is a fun trend because it blends decor with a “grab and go” dessert vibe.
16. Reusable Ribbon and Pinecone Basket Center
Basket centerpieces feel warm and homey, and they’re great for reusing. This design uses ribbon, pinecones, and a simple basket base for a classic look.
Choose a woven basket or mini crate, then line it with faux greenery so it looks full. Add pinecones on top in a cluster, then weave ribbon through the greenery for texture. Place one or two candles or a small lantern near the center so the basket becomes the focal point.
Make it unique by selecting ribbon patterns that match your table theme, like plaid, velvet look, or simple cream with red edges. Personalize by tying small gift tags to ribbon ends so it looks styled like a holiday present. For practical tips, keep candle placement stable and avoid real flames if your greenery is very dry.
17. Ombré Ornament Cluster on Mirror Base
A mirrored base makes your centerpiece look bigger and brighter. Ombré ornament clusters create a smooth, designer effect that feels modern yet festive.
Place a small mirror or reflective tray in the center, then arrange ornaments in a gradient from one color family to another. Use larger ornaments as anchors, then fill gaps with medium and mini sizes. Add a few strands of tinsel or faux garland lightly around the base so the cluster looks rich without being heavy.