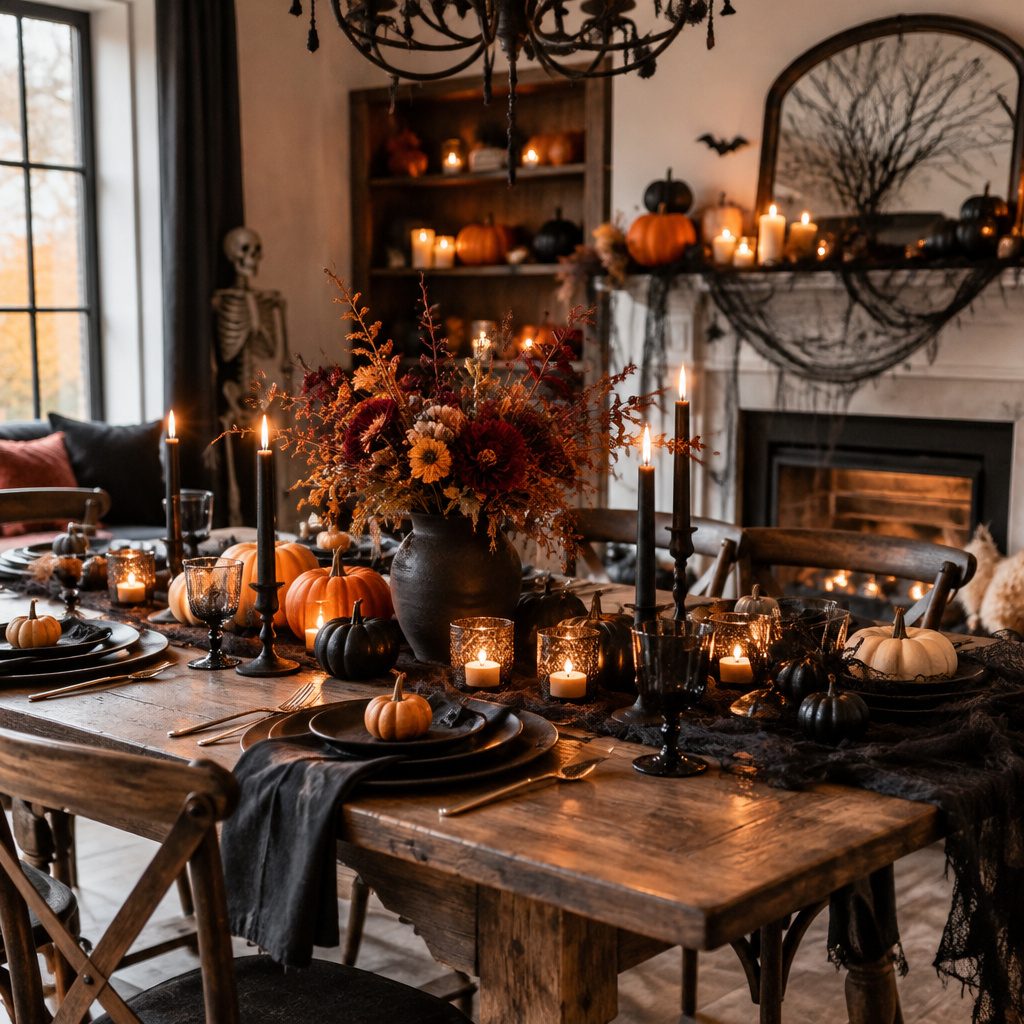
Tonight’s decorations set the mood before the first guest walks in. Pick a few spooky touches, and your space will feel like a haunted hangout in minutes.
1. Creepy-Cute Color Theme With Black, Orange, and Bone White
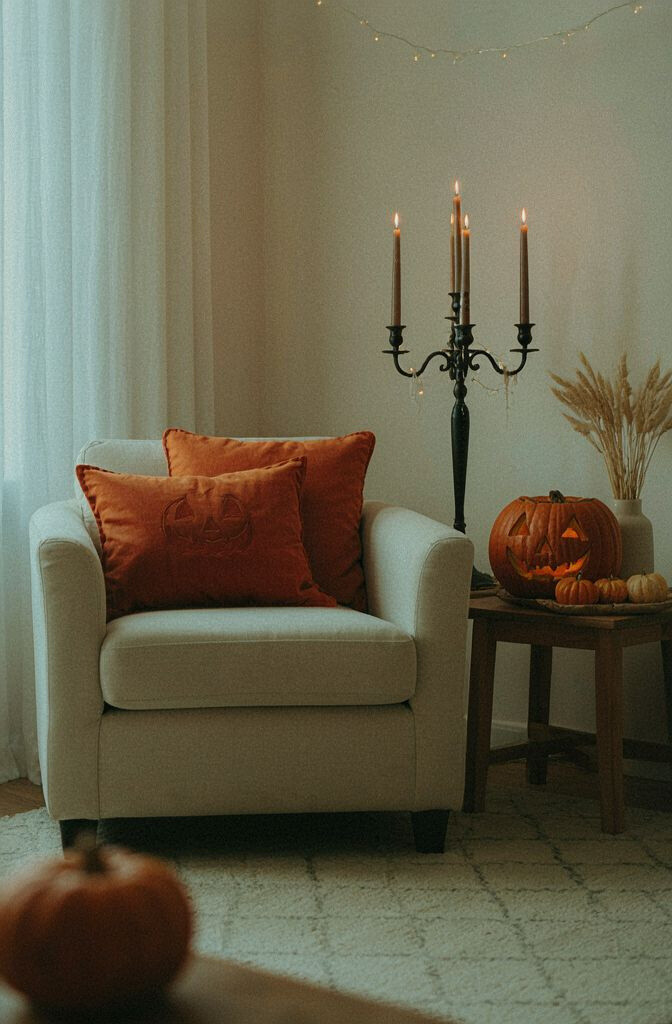
Choose a clear color palette so everything looks planned instead of messy. Black, orange, and bone white make your decor pop, especially under warm string lights.
Start with 1 main fabric or table covering and repeat that color across other areas like napkins and balloons. This helps the room feel “done” even if you’re using mostly simple items. For personalization, swap bone white for pale gray if you want a cooler, moonlit vibe, and add one accent color like deep purple for a modern twist.
2. Foggy Dry-Ice Drink Station With Glow Labels
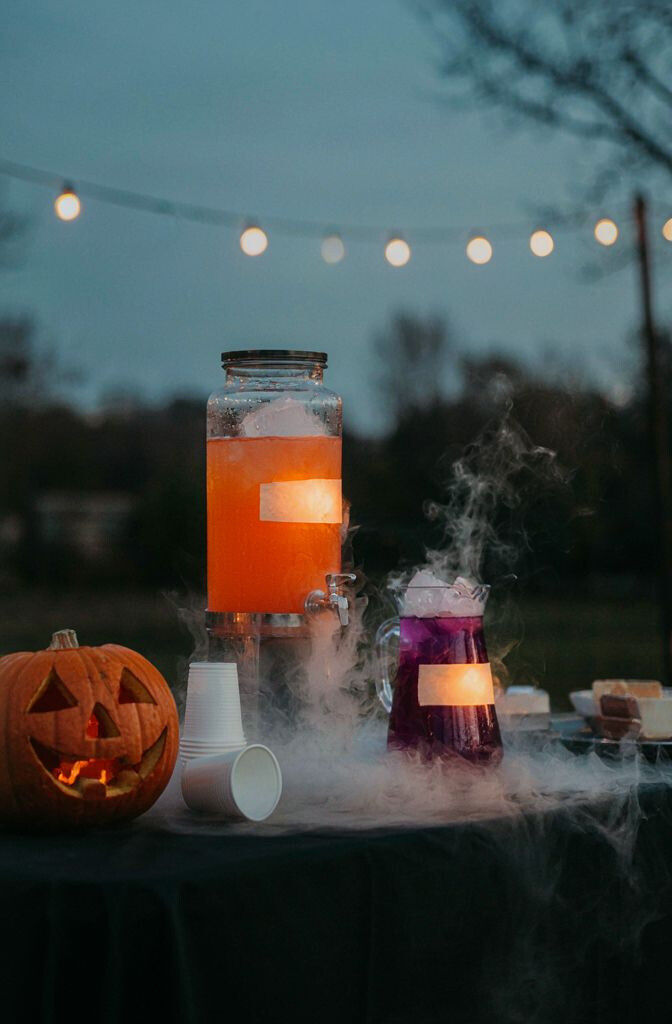
Set up a “mystery potion” drink area that looks magical the moment guests arrive. A few safe dry-ice moments create a misty effect that photographs beautifully.
Use glow-stick labels or LED mini signs to mark each drink like “Witch’s Brew” or “Spider Soda.” Place a tray of cups and garnishes beside the label so guests know what to grab right away. Keep fog away from faces and follow safe handling instructions so it stays fun and not scary in the wrong way.
For cost, look for dry-ice deals at local grocery stores or party suppliers, and reuse the same display trays each year. A trend right now is adding a “menu board” style label with bold handwriting, which makes your station feel curated without buying fancy props.
3. Hanging Spider Web Ceiling Corners With Fake Insects
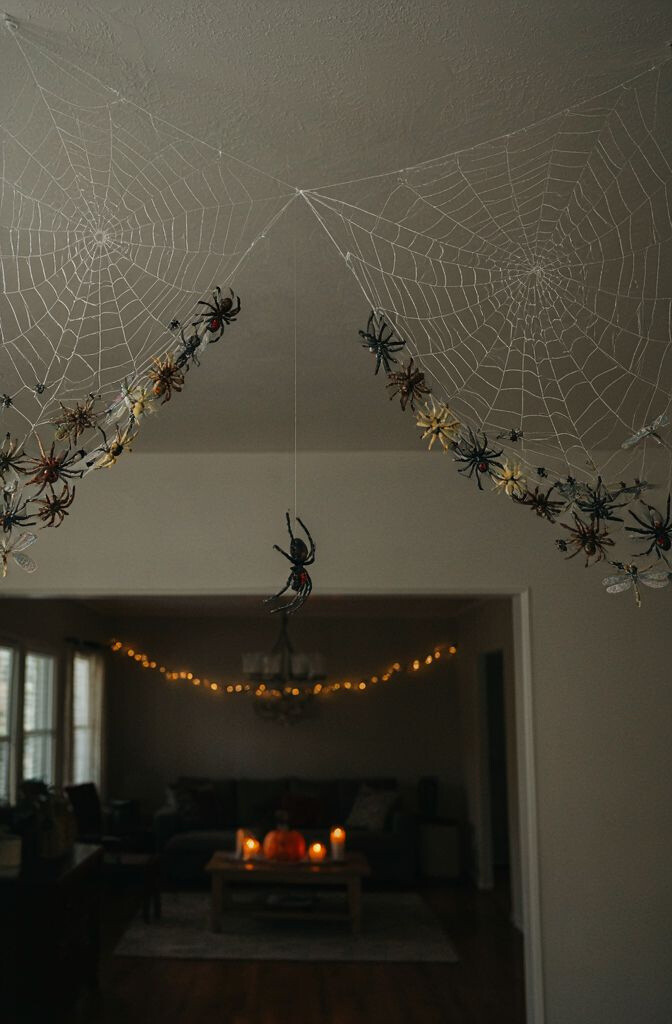
Spider webs make instant atmosphere, especially when they drape from ceiling corners. Even a small room looks bigger when the web reaches upward.
Choose lightweight web netting and secure it with removable tape so you don’t damage paint. Add a few plastic spiders or a couple of dangling insects near lights and doorways to create a “caught you” feeling. Place some webbing behind party signs so the layers look thicker and more realistic.
If you want extra personalization, mix in a subtle “silver web” look using metallic thread across one section. For practical tips, keep webs away from vents and use a lint roller on curtains so the room stays tidy.
This is usually budget-friendly, and you can reuse it annually by storing it flat. A current trend is “photo-wall framing,” where webbing becomes a backdrop for portraits instead of just ceiling décor.
4. Jack-O’-Lantern Banner Runs Over the Doorway
A banner across a doorway turns the entrance into the main event. Guests love seeing it before they even find the snack table.
Pick one long banner or create your own by stringing orange felt or cardstock jack-o’-lantern shapes. Add small battery tea lights behind a couple of cutouts for a warm glow that feels cozy. If you’re hosting outdoors, bring the banner indoors or use weather-safe materials so it doesn’t droop.
5. Spooky Table Centerpieces With Bats and Candles
Centerpieces make dinner and games feel special without extra effort. Use a simple base like a black runner and build up from there.
Try a tray with candles, a few plastic bats, and a scattering of faux ravens or glittery leaves. Keep candle flames safe by using LED candles if you have kids or if your space is crowded. This setup is unique because it combines classic Halloween symbols with a clean, modern layout.
To personalize, choose a candle color theme like amber orange for a warm look or white for an eerie “graveyard” vibe. For cost, mix one pricier centerpiece with a few lower-cost add-ons so the table looks high-end without high spending.
6. Marble-Texture “Potion” Bottles With Labels
Fill clear bottles with colored water, beads, or faux “slime” gel for an instant magical shelf. Marble-like swirls inside the bottles add depth without needing complicated crafts.
Use washable paint markers to write labels in different handwriting styles, like “sleeping spell” or “candy cure.” Add a few bottles to the bar, mantel, or sideboard so guests see them while they mingle. This decor feels unique because the bottles look like they came from a wizard shop, not a last-minute craft pile.
7. Outdoor Pathway Luminaries With Fake Pumpkin Halos
Guide guests with a glowing pathway so your yard feels inviting and spooky. Luminaries also make nighttime photos look incredible.
Place small LED candles inside paper bags or lanterns along walkways, then add pumpkin-shaped cutouts or pumpkin decals around the lantern bases. For safety, choose flameless lights and secure anything light enough to blow away. It’s practical because it reduces stumbling while still creating atmosphere.
For personalization, vary the heights by using different jar sizes and stacking a couple of thin pumpkins at intervals. Trends show more “minimal spooky,” so keeping the design simple but intentional can look very modern.
8. Haunted Photo Booth With Curtain Backdrop and Paper Spiders
Create a photo corner that makes everyone want to take pictures. A backdrop with hanging curtains and paper spiders gives a layered, theater-like feel.
Use a black or deep purple curtain, then tape a few web strands across the top for a framing effect. Add a sign that says something fun and spooky, plus handheld props like foam bats and silly “fang” masks. This is unique because it turns decoration into an activity, not just background.
For practical tips, keep the booth close to good lighting and add a small basket for props so they stay organized. Cost-wise, you can buy a simple curtain and print spider cutouts at home for a budget-friendly setup.
To personalize, change the booth theme each year by switching the color tone or swapping the text on the backdrop sign. A popular trend is using “matching props” where the props match the theme colors for a cleaner look in photos.
9. Witch Hat Planters for the Snack Table
Turn planters into center-stage decor by placing flowers or candy inside a witch hat. It’s playful, easy, and it instantly signals “Halloween snacks ahead.”
Use a small cauldron or a real hat (or a craft hat) placed on top of a plant pot, then fill with leafy greens or stacked candy. Add a few tiny pumpkins or faux berries around the base so it feels styled, not random. For personalization, use a plant with purple leaves or choose orange flowers to match your theme palette.
This idea is unique because it blends spooky characters with something lively and fresh. For cost considerations, you can reuse indoor planters and only buy small seasonal picks, which keeps spending low.
10. Glow-in-the-Dark Cobweb Ornaments for Mantels
Glow-in-the-dark cobwebs add a cool “haunted” effect when the lights dim. They’re perfect for mantels, shelves, or side tables.
Hang thin web strands and drape them so they catch candlelight or string light reflections. Add a couple of tiny glow skeleton hands or spider ornaments for extra surprise. This decor feels unique because the glow makes even simple silhouettes look more dramatic.
For practical tips, test the glow duration before your party and place it near light sources so it charges well. Costs can vary, but many glow items are small and last multiple seasons.
11. Haunted Bookshelf With “Spells” and Hidden Treats
Decorate a bookshelf like it’s filled with forbidden knowledge. Guests love seeing little details, especially when they can spot treats tucked into the display.
Use fake books, labels, and a few spooky props like skull figurines or raven silhouettes placed at different heights. Make it practical by adding a clear container hidden behind a “spell book” where you keep extra napkins or cups. This idea stands out because it creates a story, not just shapes on shelves.
Personalize by choosing themes like pirate curses, ghost stories, or witch potions, then align your labels to match. If you’re keeping costs down, use old books and print replacement covers rather than buying new décor.
Current trends lean toward “micro-themes” on each shelf section, so try one row for potions, one for monsters, and one for creepy science.
12. Balloon Cluster With a “Spider Web” Focal Point
A balloon cluster can look sophisticated when you anchor it with one strong idea. Use a web-themed balloon centerpiece so the whole bunch feels coordinated.
Pick helium balloons or lightweight foil balloons, then add one giant black balloon shaped like a spider or web. Tie the cluster to a corner or to the snack table so it naturally pulls attention where you want it. For personalization, mix matte balloons with shiny ones for a rich texture.
13. Skeleton Hand Napkin Rings for Instant Fun
Napkin décor is small but makes a big difference at the table. Skeleton hand napkin rings look cute, spooky, and a little bit dramatic.
Wrap napkins in black or orange fabric look-alikes, then slide the hand rings on top. Add a single sprig of faux greenery or a tiny pumpkin pick so each place setting feels styled. This is unique because it upgrades everyday table items into Halloween characters.
For practical tips, choose rings that fit your napkins without crushing them, and consider LED tealights for safe candle vibes. Cost-wise, you can start with fewer rings if they’re pricey and reuse them on the main table only.
A trend lately is “place setting styling,” where guests notice the details, take photos, and feel extra welcomed.
14. Giant Hanging Bat Garland Over the Main Wall
A giant bat garland turns a plain wall into a dramatic scene. It’s bold without requiring much space or construction.
Hang the garland at different heights so some bats “flutter” lower and others float near the top. Secure it with hooks or removable clips, then add a few scattered web patches around the edges for depth. Personalize by mixing matte bats with glittery ones or choosing a color like silver-gray for a moon-themed look.
15. Pumpkin Votives With Led Candles and Carved Labels
Use small pumpkins as candle holders to create cozy glow points around the party space. Votives also help guide guests toward snacks and seating.
Choose LED candles shaped like teardrops or classic flames, then top each pumpkin with a carved-style label using paint or permanent marker. Place a few along the entry, on a side table, and near the dessert table. This feels unique because it combines “jack-o’-lantern energy” with a calmer, elegant glow.
For practical tips, keep candles steady and use pumpkins that are stable, especially outdoors. Costs can be controlled by buying a few pumpkins and using them as reusable bases for the same LED candles year after year.
16. Cauldron Center Bowl for Candy and “Witch Snacks”
A cauldron candy bowl is the classic Halloween anchor for a reason. It’s instantly recognizable, and it keeps treats from turning into a messy pile.
Fill the bowl with colorful wrapped candy, popcorn, or gummy eyeballs, then add a sprinkle of faux “moss” around the edge. Put a scoop or small serving spoon nearby so guests can grab quickly. This idea is unique because it’s functional décor that invites interaction.
Personalize by changing the treat mix to match your theme colors, like orange-and-black candies for a coordinated look. For cost, look for a reusable cauldron or a budget-friendly plastic version that you can wash and reuse.
Current trends favor “mess-free snacking,” so using scoops and small portions makes the party feel cleaner while still being fun.
17. “Witch Trail” Table Runner With Falling Leaves
A themed table runner can make your entire dining area look designed. The “witch trail” idea uses leaf-like elements to guide the eye across the table.
Lay a black runner and add a strip of faux leaves down the center, then weave a few mini pumpkins or acorns along the path. Add a few tealights in the middle for a glowing line effect. This is practical because runners cover table marks, protect surfaces, and also hide small clutter like extra utensils.
For personalization, choose leaves in dark brown, copper, or green to match your color palette. Cost considerations are flexible: you can buy one runner and reuse it, then only replace seasonal leaf accents as needed.
18. Haunted Mirror With Fog Spray and Framed Quotes
Use a mirror to create a “haunted” mood, especially in a hallway or entry area. When you add fog-like effects, the whole space feels more mysterious.
Apply a temporary fog spray or use a removable window film so the reflection looks spooky without damaging the mirror. Frame a few eerie quotes around it like “Do not disturb” or “Beware the midnight.” This is unique because it transforms a normal object into a dramatic centerpiece.
For practical tips, test the effect on a small corner first and have a cloth ready for quick cleanup. Costs are usually low if you already have a mirror, and DIY quotes help you avoid buying expensive framed décor.
19. Spooky Sound-Activated Rattles and Subtle Motion Decor
Motion and sound can make décor feel alive, even if you keep the visuals simple. Small sound-activated items create surprise when guests move through the room.
Place a few battery mini rattles near doorways or behind signs, then add motion accents like bobbing figurines or swinging charms. Keep them subtle so they don’t overwhelm guests, especially kids. This makes the theme unique because it adds an extra layer that goes beyond “just looking.”
To personalize, choose sounds that fit your vibe, like soft creaks or gentle rattles rather than loud noises. For cost, start with two or three items and place them strategically where they’ll get noticed most.
A trend right now is “interactive décor,” where guests feel included through small surprises, not big scares.
20. Seasonal Lighting Plan With Orange Strings and Purple Accents
Lighting is the secret weapon that makes every decoration look better. Even cheap décor looks spooky when it’s lit from the right angle.
Use warm orange string lights for a cozy glow, then add a few purple or blue accent lights near the bar, dessert table, or photo booth. Try hanging lights slightly higher than eye level so they create an even haze instead of harsh spots. This is practical because you can reuse the same lights for multiple parties.
For personalization, dim the main lights and rely on your Halloween color lighting, then place one “bright” area where guests should focus, like the snack station. Costs can be controlled by using existing bulbs first and adding only the accent colors you need.