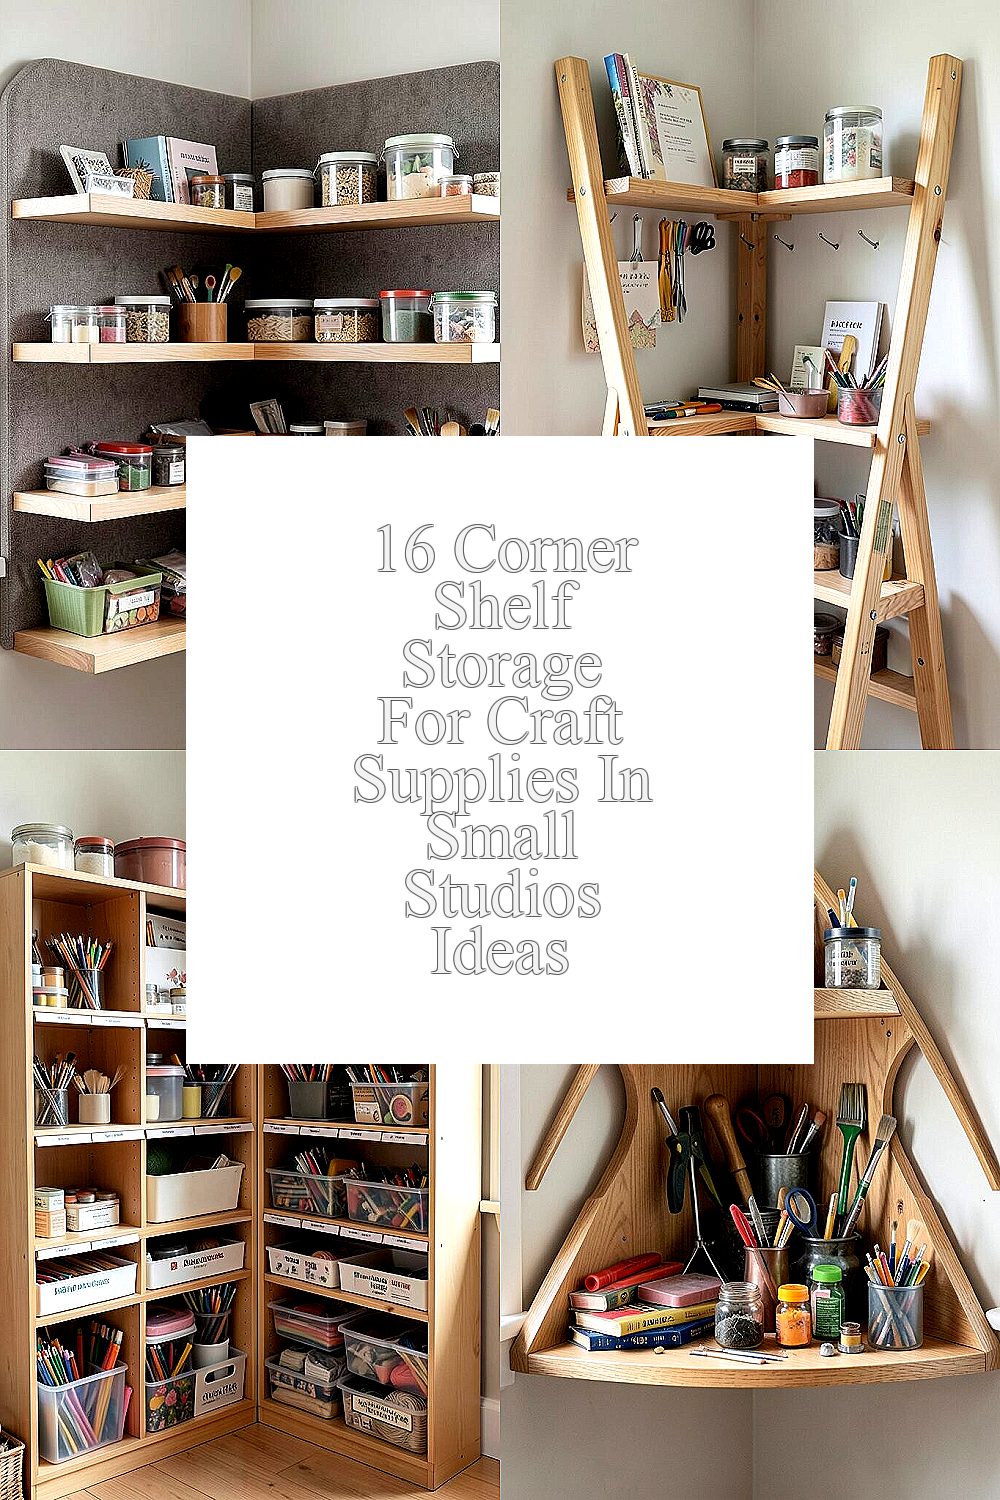
Corner space is sneakily powerful. The right shelf makes your studio feel calmer and easier to use.
When supplies have a home, your creativity gets room to breathe. Let these ideas give you practical, stylish ways to store everything in tight corners.
-
1. Floating Corner Shelves With a Soft Back Panel

Floating Corner Shelves With a Soft Back Panel Picture two slim shelves meeting at the corner like a friendly handshake. A light-colored back panel makes tiny items easier to see.
This style keeps your walls feeling open while still adding storage. Use small bins or drawer inserts on each level so glue sticks, paint bottles, and tape rolls don’t wander. For a personal touch, pick a back color that matches your current craft theme, like warm cream for paper projects or a muted sage for mixed media.
-
2. Corner Shelf Ladder With Hanging Pegs

Corner Shelf Ladder With Hanging Pegs Imagine a corner “ladder” shelf with steps for boxes and little pegs along the side. It looks playful and also helps you use vertical space fast.
You can hang scissors, measuring spoons, and small tools where you can grab them quickly. This setup cuts down time spent searching, which is a huge win in a small studio. Consider using hooks made for light items so your shelves stay steady without adding heavy load.
For cost, start with a basic shelf ladder and add a few peg hooks later. If you craft with ribbon or string, hang spools on the pegs and group them by color. To personalize, paint the ladder’s side in a fun shade like coral or navy, then match it with a matching organizer tray on the bottom step.
-
3. Layered Corner Cubby Shelves With Removable Labels

Layered Corner Cubby Shelves With Removable Labels Think of stacked cubbies that fit together like a puzzle in the corner. Some cubbies can hold bigger items while others stay perfect for small supplies.
Removable labels make swapping projects easy when you switch from scrapbooking to ceramics. Put frequently used items at eye level so you don’t have to reach or stretch. A clear labeling system also helps guests know where things go, which keeps the studio neat.
For a unique look, try mixing two finishes, like natural wood with a white divider. If budget is tight, use a simple modular cubby set and add label strips and small plastic dividers. Current trend-wise, “open storage with tidy inserts” is popular because it feels modern while still staying organized.
-
4. Triangle Corner Shelf for Knickknacks and Small Tools

Triangle Corner Shelf for Knickknacks and Small Tools A triangle shelf in the corner feels smart and compact, like it was made for tiny collections. It’s a great spot for things you use daily, such as thread spools and paint markers.
The benefit is simple: you keep clutter off your desk and still see everything at a glance. Use shallow containers with a lid or open trays with raised edges so items don’t slip. For personalization, add a small sticker map of your favorite art styles, or place a tiny photo frame inside the corner shelf area.
When thinking cost, a triangle shelf is often cheaper than large built-in systems. Look for one that’s easy to mount and can hold at least a few pounds per square area. If you want extra safety, add rubber pads under containers so glass and metal won’t slide.
-
5. Corner Shelf With a Built-In Peg Rail and Bin Stack

Corner Shelf With a Built-In Peg Rail and Bin Stack Picture a corner unit where one side holds a peg rail and the other side holds stacked bins. It turns a forgotten corner into a mini command center.
Benefit time: tools get hung, small supplies go into bins, and your workspace stays clear. Use flat bins for paper, envelopes, and stencils, and use open bins for items you grab often. This combo is especially helpful for mixed crafts because you can sort by material type.
For a unique vibe, choose a peg rail in brushed metal and bins in matching colors. If you’re cost-conscious, build the rail as an add-on to an existing corner shelf system. Add personalization by threading a patterned ribbon along the front edge of the unit so it looks styled, not just practical.
-
6. Corner Shelf With Glass Jars for Color-Coordinated Supplies

Corner Shelf With Glass Jars for Color-Coordinated Supplies Imagine clear glass jars sitting neatly on corner shelves, each jar filled with a different color. Seeing everything through glass feels calm and inspiring.
This works great for beads, sequins, buttons, and pigments. You’ll love how easy it is to match shades when you’re making cards, jewelry, or keychains. For best results, use small jar sizes so the corner doesn’t look too crowded.
Choose jar lids that match your studio style, like matte white or brass. If you want to keep costs low, re-use clean spice jars from your kitchen, then label them with craft-friendly tape. A current trend is “visible organization,” and jars are a simple way to get that look without complex upgrades.
-
7. Corner Shelf With a Flip-Down Writing Surface for Templates

Corner Shelf With a Flip-Down Writing Surface for Templates Picture a corner shelf that includes a small flip-down board tucked under the shelves. It’s like a hidden desk for patterns and sketching.
This setup gives you a surface for cutting templates, planning layouts, or jotting color notes. It also stops papers from spreading across your table. Add a clip strip along the underside so rulers and craft knives can stay visible and ready.
For personalization, paint the flip-down surface with chalkboard paint or use a magnetic sheet background. When cost matters, buy a small corner shelf and add the flip panel as a separate hardware kit. Keep it practical by using a light-touch hinge so the board opens smoothly and won’t feel heavy during daily use.
As a bonus, this idea supports the current trend of “multi-use storage” that makes small spaces feel bigger.
-
8. Reclaimed Wood Corner Shelves With a Rustic Edge

Reclaimed Wood Corner Shelves With a Rustic Edge Think of corner shelves made from reclaimed wood, with warm grain and a slightly weathered look. The texture makes your craft supplies feel like part of a cozy story.
Rustic corners bring uniqueness right away, even if you keep your organization simple. Use small baskets for thicker items like rolls of fabric, and use tiny trays for fine details like beads. Your studio will feel inviting, and you’ll enjoy reaching for supplies because they look cared for.
On cost, reclaimed wood can be budget-friendly if you hunt local salvage stores or reuse old furniture. Just sand the surface well and seal it with a clear coat so markers and glue won’t soak in. Personalize by carving or painting small symbols, like stars for journaling or a paint palette icon for art projects.
To keep the corner looking tidy, use matching basket sizes so the shelves don’t look random.
-
9. Corner Shelf With a Curtain-Style Front for Hidden Clutter

Corner Shelf With a Curtain-Style Front for Hidden Clutter Imagine your corner shelf with a soft fabric front that covers messy supplies when you want a clean look. It feels like a little “cabinet” without needing full doors.
This idea is great for studios where you share the space or want it to look neat fast. When the curtain opens, you still get access, and you don’t have to stare at every bottle and paper. Choose a washable fabric so dust and spills don’t become a problem.
For best organization, add a simple inside shelf system with small bins. Personalize by using a pattern that fits your style, like polka dots for playful paper crafts or simple stripes for sewing. For cost, curtains can be one of the cheapest ways to hide clutter while still adding storage.
A current trend is “soft storage,” and fabric fronts can make your corner feel less harsh and more cozy.
-
10. Corner Shelf With a Peg Board Back for Hanging Paper and Tools

Corner Shelf With a Peg Board Back for Hanging Paper and Tools Picture a peg-board style backing behind corner shelves, with hooks that hold rulers, cutting guides, and tool handles. It gives a practical, maker vibe that looks great in small studios.
Benefit: you can keep flat items upright and visible instead of folding them or stacking them. Use small binder clips for cardstock, and use hooks for tape dispensers and scissors. This makes your crafting routine smoother because tools are always in the same spot.
Uniqueness comes from customizing the layout as your needs change. When you start a new project type, add new hooks or move existing ones. To personalize, paint the peg board in a color you love, such as deep teal or warm mustard, then match it with color-coded labels.
-
11. Corner Shelf With Sliding Baskets for Easy Access

Corner Shelf With Sliding Baskets for Easy Access Imagine corner shelves with baskets that slide out like little drawers. You pull one basket forward and instantly see what’s inside.
This helps because small studios often have tight reach, and sliding baskets reduce digging through piles. Use them for yarn bundles, ribbon stacks, or small craft kits. Add a “most-used” basket near the top so your daily tools are always reachable.
For cost, you can find simple basket systems that attach to standard corner shelf hardware. If you want a DIY version, build shallow frames and attach smooth drawer slides. Personalize the baskets with fabric liners or washi tape around the edges for a cute, handmade touch.
-
12. Corner Shelf With Magnetic Strips for Metal Craft Supplies

Corner Shelf With Magnetic Strips for Metal Craft Supplies Think of a corner shelf that includes magnetic strips to hold metal items flat and visible. It’s especially perfect for craft tools and tiny metal parts.
Benefit: you reduce clutter and prevent small items from getting lost in drawers. Use magnets for needle tins, metal craft stamps, and clips. You can even hold small scissors in a safe position if your magnets are strong enough and the items are light.
For uniqueness, mix magnetic strips with clear lidded containers on adjacent shelves so the corner shows both “hang” and “store.” Personalize by labeling each magnetic area with tiny icons, like a thread spool for sewing and a paintbrush for stencils. For cost, magnetic strips are usually affordable, and they upgrade an existing shelf without major construction.
-
13. Corner Shelf With Rotating Turntables for Small Bulk Items

Corner Shelf With Rotating Turntables for Small Bulk Items Picture a small rotating turntable placed on a corner shelf. It’s like a lazy Susan that helps you reach items without moving stacks.
This is a strong option when you buy refills, like beads, brads, or crafting screws. The benefit is clear visibility, and it prevents older items from getting buried. Use dividers on the turntable so colors or categories stay separated.
For personalization, paint the turntable rim in a studio color and add small label dots. Consider cost by using a turntable you already have, like a kitchen lazy Susan, then dedicate it to craft supplies. A current trend is “round organization,” because it looks neat and makes grabbing supplies feel fun and fast.
Keep it stable by placing a non-slip mat under the turntable so it doesn’t wobble during use.
-
14. Corner Shelf With a Storage Rail for Long Supplies

Corner Shelf With a Storage Rail for Long Supplies Imagine a corner shelf with a rail that holds long items like rulers, rolled paper, and canvases. It keeps awkward supplies from leaning and falling.
This setup helps you avoid clutter piles, and it also protects your supplies from bending. Use an upper rail for longer items and lower shelves for smaller ones. If your studio is narrow, this rail approach can reduce how much space each item needs to “rest.”
For uniqueness, add padded end caps so delicate surfaces won’t scratch. Personalize the rail with color strips for each project type, like “card making” in one color and “sewing” in another. For cost, rails can be a low-cost add-on to a corner shelf system, especially if you already have basic mounting brackets.
-
15. Corner Shelf With Hidden Drawer Inserts for Sticky Mess

Corner Shelf With Hidden Drawer Inserts for Sticky Mess Picture corner shelves that look open on the outside, but include hidden drawer inserts underneath. It’s perfect for sticky things that you don’t want out in the open.
Use the drawers for hot glue refills, tape, gel mediums, and messy craft adhesives. The benefit is fewer spills and less clutter visible on shelf tops. Add a liner in each drawer so cleaning becomes quick if something accidentally leaks.
For personalization, label drawers by “clean projects” and “mess projects,” or label by craft season like “winter cards” and “summer tags.” On cost, hidden inserts can be a mid-range option, but you can start with one shelf section and upgrade later. A current trend is “smart concealment,” and drawers are a simple way to keep your corner organized and pretty.
-
16. Corner Shelf With Color-Block Arrangement and Matching Trays

Corner Shelf With Color-Block Arrangement and Matching Trays Imagine your corner shelves arranged in color blocks, with matching trays that repeat the same shades. It looks styled, like a mini gallery for your supplies.
This idea is unique because it uses organization as decoration. Sort supplies by color, then place them in matching trays so your corner looks cohesive. The benefit is that you’ll spot what you need quickly, and everything feels calmer visually.
For personalization, choose colors that match your studio walls or your favorite craft brand colors. If you’re on a budget, start with a few trays and add more as you go, mixing plastic, fabric, and paper organizers as needed. Current trend-wise, coordinated storage is popular because it makes small spaces feel intentional rather than crowded.
To make it actionable, set a weekly “reset” habit where you put any stray item back into its color tray, then admire how neat your corner looks.